
Setup guide
From TradingView alert to live order in ~10 minutes
Everything you need to automate your trading with RoboQuant Connect — no code, no scripts, just four steps.
Demo
See it in action
From TradingView alert to live Tradovate order — the full setup, step by step, in one short walkthrough.
Step 1
Create your account
Start your 7-day free trial and open the app. You can explore everything with a Tradovate demo account before any real money is involved.
Step 2
Connect your Tradovate account
In the app, go to Accounts → Connect Tradovate. You'll be sent to Tradovate's official login (OAuth) — we never see your password. All accounts under your login are connected at once, including prop-firm evaluation and funded accounts.
We recommend starting with a demo account to verify your full setup end-to-end before switching to live.
Step 3
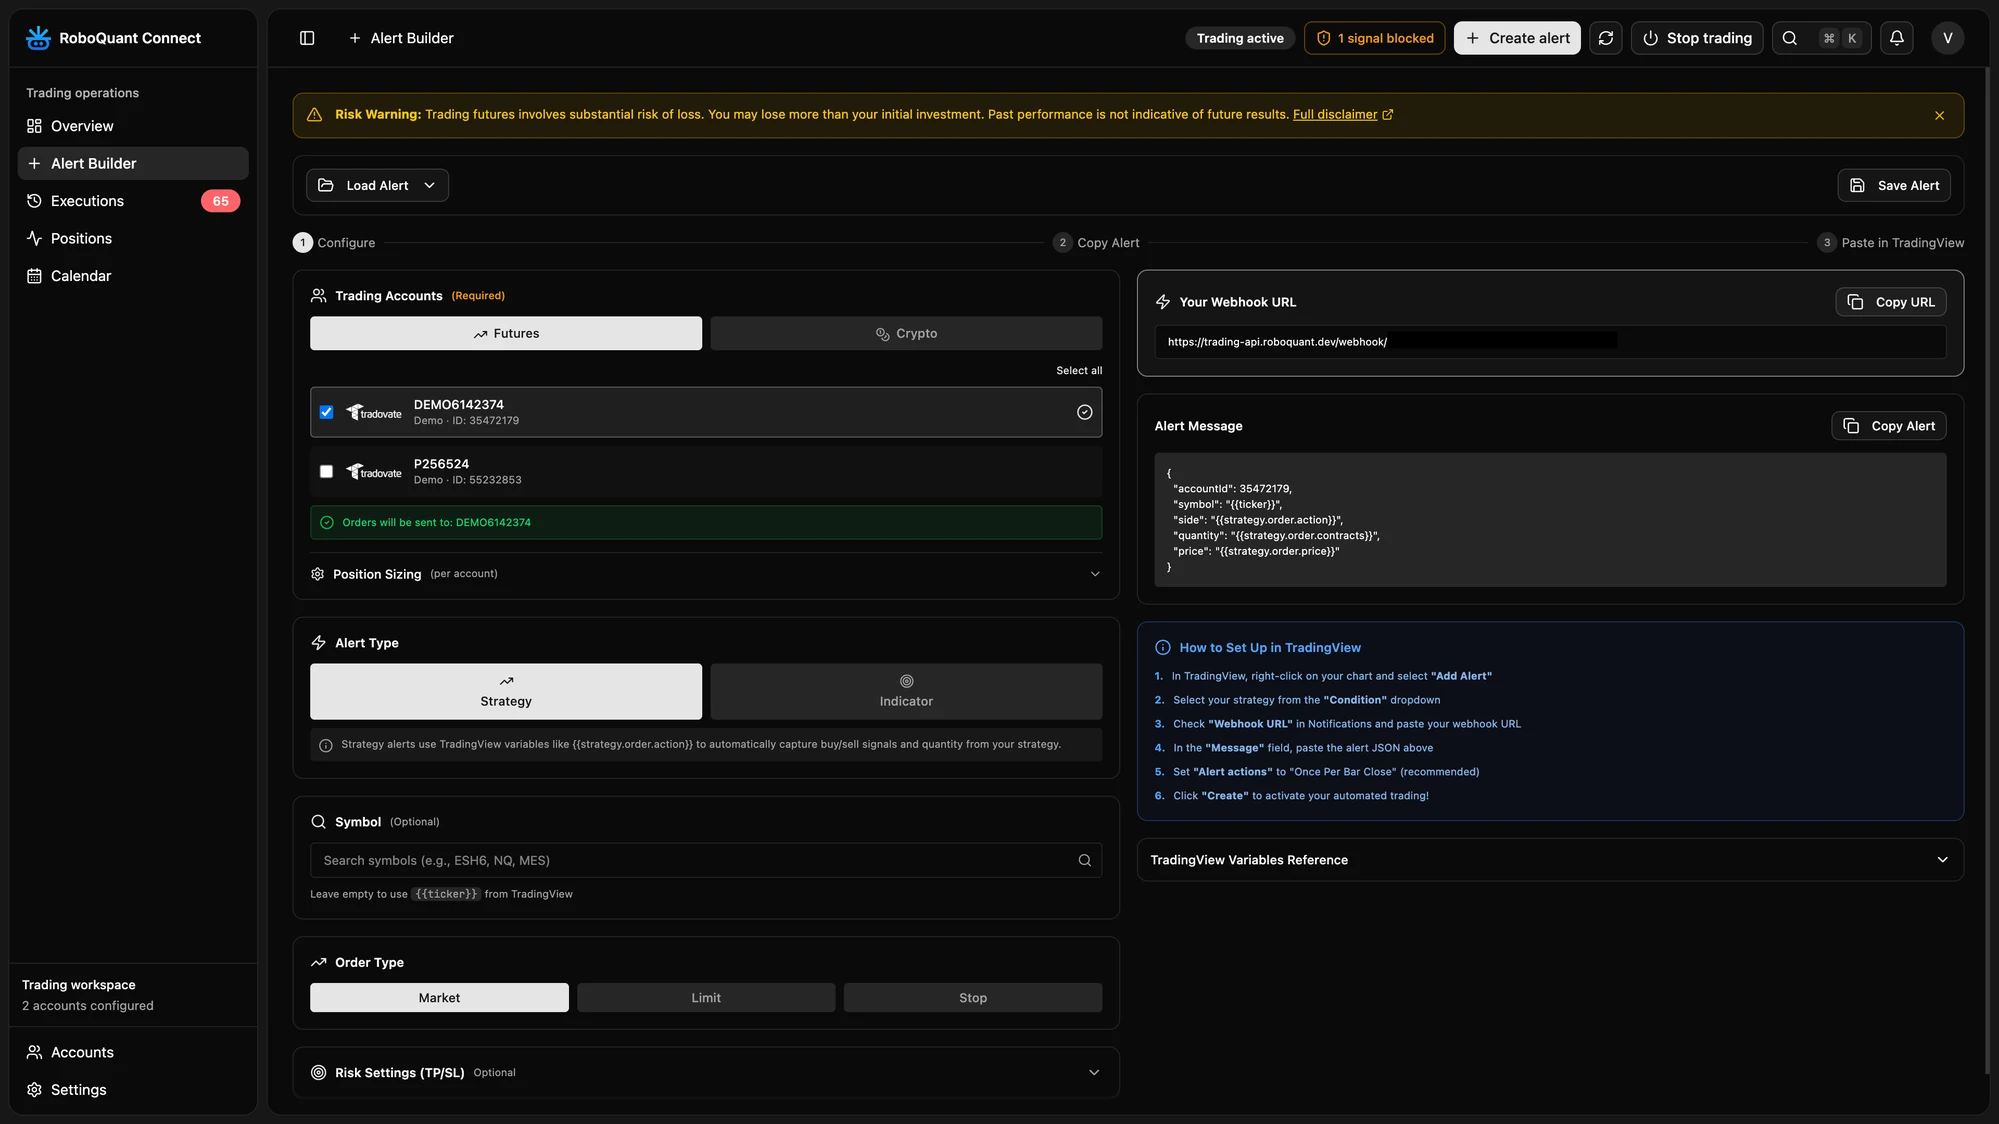
Build your alert
Open the Alert Builder: pick the account(s) to trade, choose position sizing, order type and optional take-profit / stop-loss. Then copy two things:
- Your personal Webhook URL
- The generated Alert Message (JSON)
Tip: leave the symbol empty to use TradingView's {{ticker}} placeholder — the alert will always trade the chart it fires from.
Step 4
Create the alert in TradingView
- In TradingView, right-click on your chart and select “Add Alert”.
- Pick your strategy or indicator in the “Condition” dropdown.
- In the Notifications tab, check “Webhook URL” and paste your webhook URL.
- In the “Message” field, paste the alert JSON you copied from the Alert Builder.
- Set “Alert actions” to “Once Per Bar Close” (recommended to avoid repainting signals).
- Click “Create” — your automated trading is live.
Webhook alerts require a TradingView Essential plan or higher.
Step 5
Verify it works
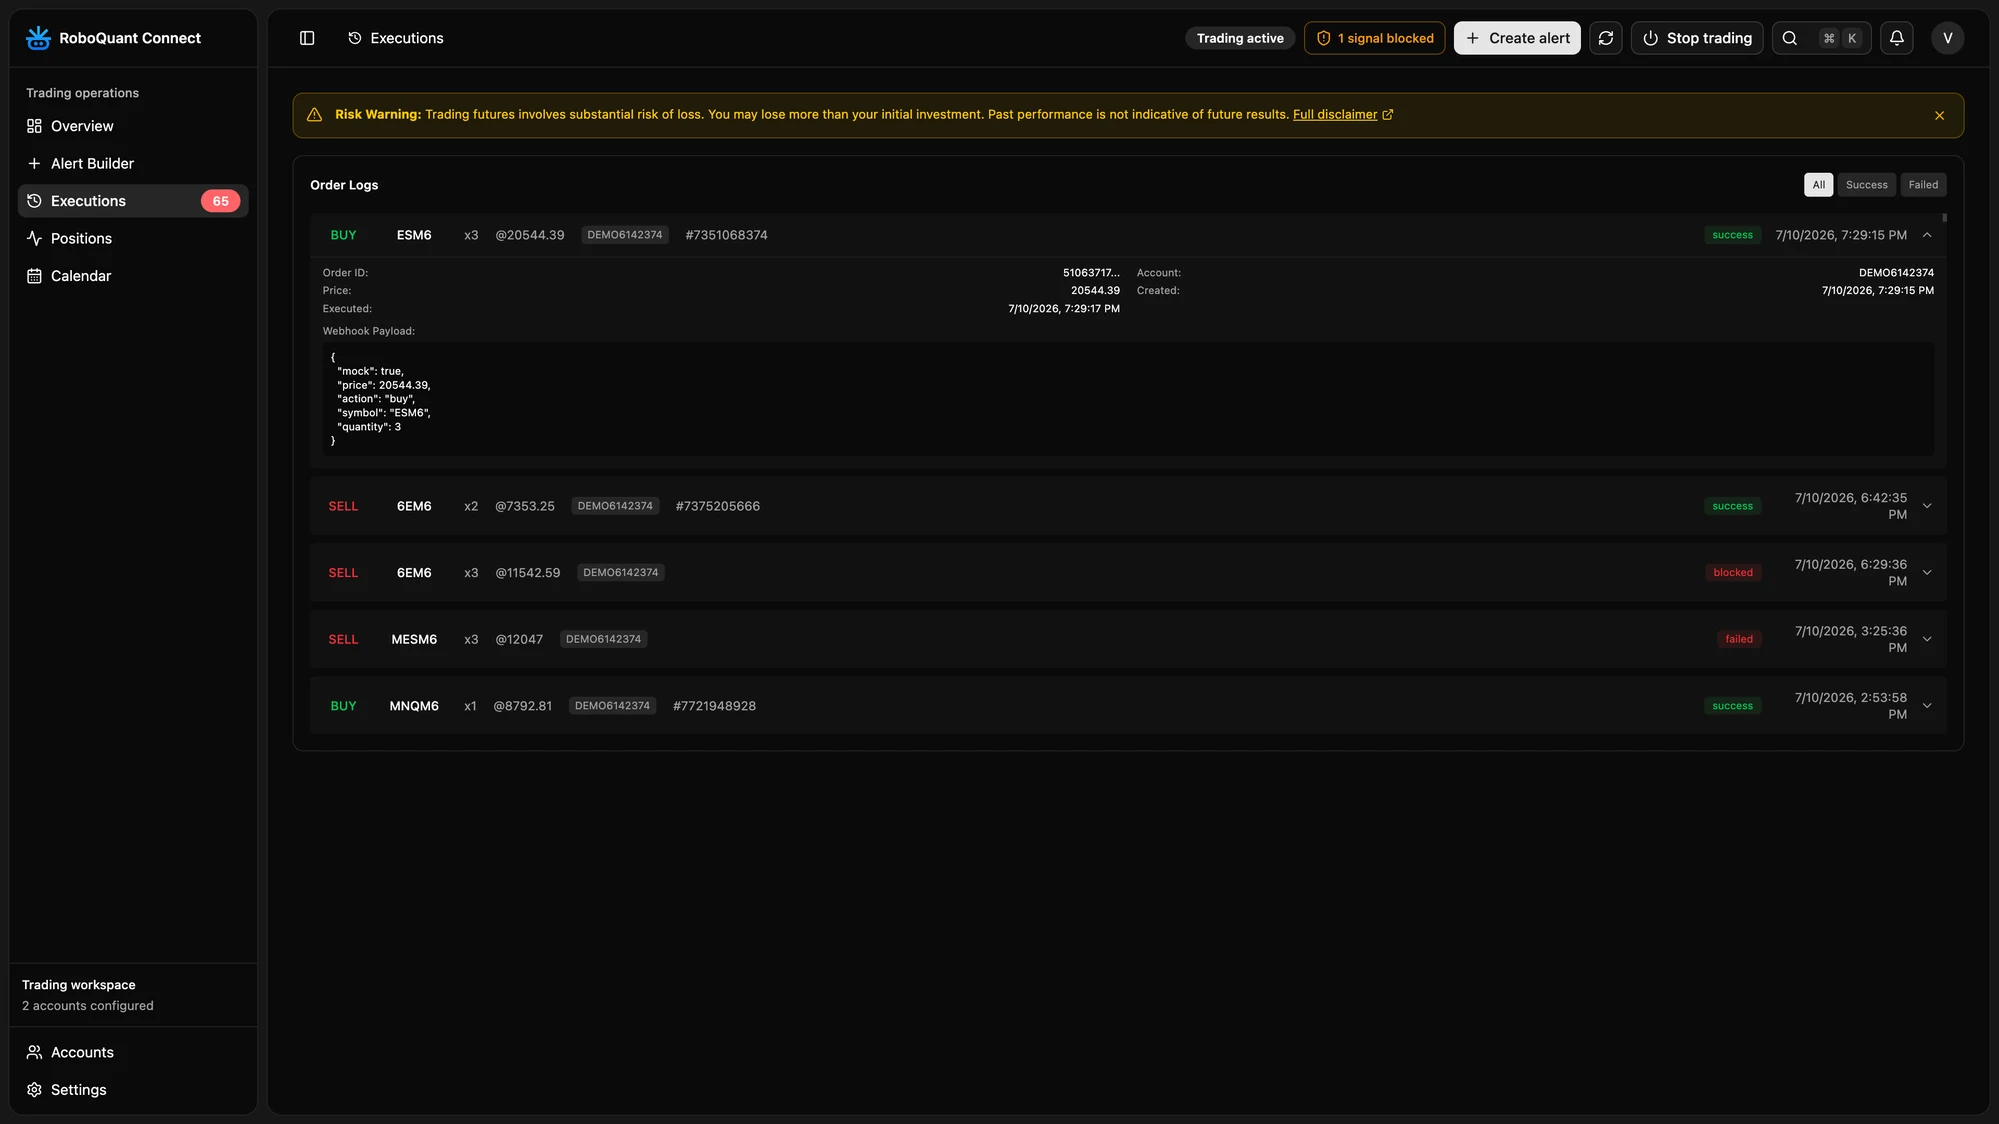
Fire a test signal (or wait for your next one). Every order shows up in Executions within a second — with its status, broker order ID and the exact payload that triggered it. The Active Alerts panel confirms which alerts are armed, and Positions tracks your live P&L across every account.
Step 6
Set your safety rails
Before going live, review the built-in protections: a kill switch that instantly blocks all orders, per-account daily trade limits, and a symbol whitelist so an alert can never trade an instrument you didn't approve.
Troubleshooting
Alert fired but no order?
Check that the alert JSON includes your account (it must contain accountId) and that the webhook URL was pasted into TradingView's Notifications tab — not the message body.
Order shows “failed” in Executions?
Open the entry to see the exact reason. Most common: the Tradovate session needs a reconnect (Accounts → Reconnect), or the contract month in your alert has expired — use the root symbol (e.g. MNQ) or {{ticker}} so it always trades the current front month.
Still stuck?
Check the FAQ or reach out from inside the app — we usually respond within a few hours.
Ready to put your strategy on autopilot?
Free for 7 days. Cancel anytime.
Automated trading involves risk of loss.